1. Creating a Facebook Application
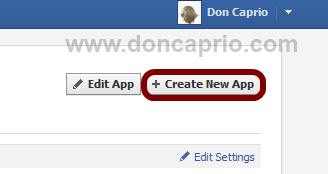
i. Head on to facebook developer page, you should create a new app by clicking the button at the top right.
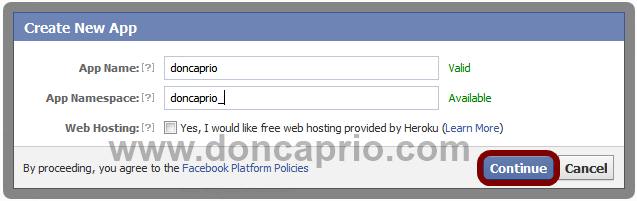
ii. Enter your application name and namespace,input the captcha code and proceed.
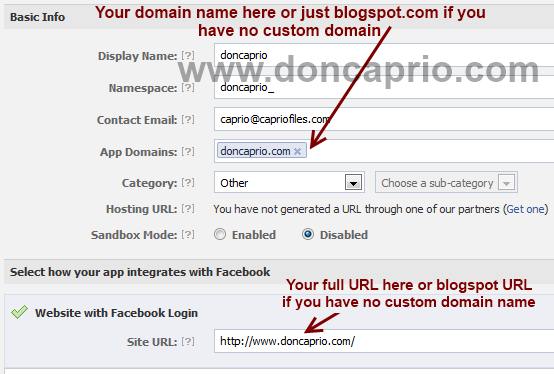
iii. On the next page, enter your custom domain name (if you’re using a custom domain) or just blogspot.com (if you’re using blogspot sub domain) in the space provided for App domain.
For App website, enter you blog URL. ( http://www.xyz.com/ or http://xyz.blogspot.com/ ). Be sure it starts with http:// and ends with / as shown in the screenshot below:
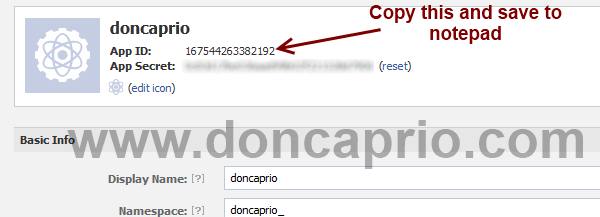
iv. Scroll down a bit and hit the Save Changes button. Now you’re done with creating your facebook application but there’s one more thing to do. On that same page, you should see your application ID. Copy it and save somewhere, you’re gonna be needing it.
iii. On the next page, enter your custom domain name (if you’re using a custom domain) or just blogspot.com (if you’re using blogspot sub domain) in the space provided for App domain.
For App website, enter you blog URL. ( http://www.xyz.com/ or http://xyz.blogspot.com/ ). Be sure it starts with http:// and ends with / as shown in the screenshot below:
iv. Scroll down a bit and hit the Save Changes button. Now you’re done with creating your facebook application but there’s one more thing to do. On that same page, you should see your application ID. Copy it and save somewhere, you’re gonna be needing it.
2. Adding the codes to your template
Log in to your blogger account and click on Template > Edit HTML > Check Expand Widget Template
i. Press Ctrl + F and search for this code:
<html
This should be found on the second or third line of your template.
- Right in front of this, add the following code:
i. Press Ctrl + F and search for this code:
<html
This should be found on the second or third line of your template.
- Right in front of this, add the following code:
xmlns:fb='http://www.facebook.com/2008/fbml'
-Be sure to have a space before and after this code. Take a look at the example below:
<html xmlns:fb='http://www.facebook.com/2008/fbml' expr:dir='data:blog…………..2005/gml/expr' >
ii. Press CTRL + F on your keyboard and search for this:
<body>
If you can’t find this, search for something similar. You should search for this instead:
<body>
If you can’t find this, search for something similar. You should search for this instead:
<body expr:class='"loading" + data:blog.mobileClass'>
In the next line, paste this code:
<div id="fb-root"></div>
<script>
window.fbAsyncInit = function() {
FB.init({
appId : 'YOUR APPLICATION ID HERE',
status : true, // check login status
cookie : true, // enable cookies to allow the server to access the session
xfbml : true // parse XFBML
});
};
(function() {
var e = document.createElement('script');
e.src = document.location.protocol + '//connect.facebook.net/en_US/all.js';
e.async = true;
document.getElementById('fb-root').appendChild(e);
}());
</script>
Be sure to replace YOUR APPLICATION ID HERE with the application ID I asked you to copy earlier, remember?
iii. Now, let’s add the open graph meta tag. Search for this code in your template:
</head>
In the line above it, paste this piece of code:
<meta property="fb:app_id" content="YOUR_APP_ID" />
Replace YOUR_APP_ID with that same application ID you previously copied.
iv. Now here’s the last part of tweaking your template your template to make it display Facebook comment box. The last thing is the iframe to display the comment box where you want. Search for this in your template:
<data:post.body/>
If you’re using a magazine style template, you’re likely to have more than one occurrence of this. Using the wrong one won’t make the comment show up. If you’re not sure about which one to use, search for this instead:
<div class='post-footer-line post-footer-line-1'>
In the line just below it, paste this code:
<b:if cond='data:blog.pageType == "item"'>
<style>
.doncaprio-share-buttons
{
-webkit-border-radius: 5px;
-moz-border-radius: 5px;
border-radius: 5px;
border:1px solid #BBBBBB;
background-color:#F2F2F2;
-webkit-box-shadow: #B3B3B3 5px 5px 5px;
-moz-box-shadow: #B3B3B3 5px 5px 5px;
box-shadow: #B3B3B3 5px 5px 5px;
padding: 5px;
margin: 10px;
}
</style>
<p align='center'>
<div align='center' class='doncaprio-share-buttons' style='background: #f2f2f2;'>
<font size='6'><strong>Post a Comment</strong></font>
<br/>
<script src='http://connect.facebook.net/en_US/all.js#xfbml=1'/>
<div><fb:comments expr:href='data:post.url' expr:title='data:post.title' expr:xid='data:post.id' width='450'/></div><div align='right'/></div></p></b:if><span class='post-comment-link'>
<b:if cond='data:blog.pageType != "item"'>
<b:if cond='data:blog.pageType != "static_page"'>
<b:if cond='data:post.allowComments'>
<b:include data='post' name='comment_count_picker'/>
</b:if>
</b:if>
</b:if>
</span> <span class='post-icons'>
<!-- email post links -->
<b:if cond='data:post.emailPostUrl'>
<span class='item-action'>
<a expr:href='data:post.emailPostUrl' expr:title='data:top.emailPostMsg'>
<img alt='' class='icon-action' height='13' src='http://img1.blogblog.com/img/icon18_email.gif' width='18'/>
</a>
</span>
</b:if>
Save your template, the Facebook comment form should now appear. If it looks rather small, replace width=’450′ with width=’600′. This increases the width from 450px to 600px.
3. Enabling notification for comments on every post
This is the last part and it’s optional but I recommend it. Enabling
this lets you know whenever someone comments on your blog. You get a
regular notification on Facebook and you can visit your blog to reply
the comment.
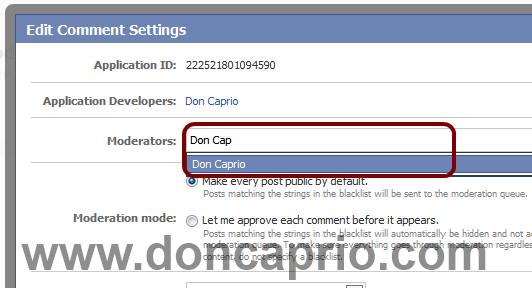
- Visit this URL: https://developers.facebook.com/tools/comments/?id=YOUR_APP_ID
- Be sure to replace YOUR_APP_ID with your real application ID
- On the page that opens, click on settings and add yourself as moderator
Read Full Article Here
- Visit this URL: https://developers.facebook.com/tools/comments/?id=YOUR_APP_ID
- Be sure to replace YOUR_APP_ID with your real application ID
- On the page that opens, click on settings and add yourself as moderator
Read Full Article Here